Motorola Moto G8 Power Lite
Android 9.0
Select help topic
1 Find "Access Point Names"
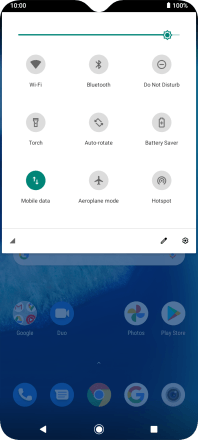
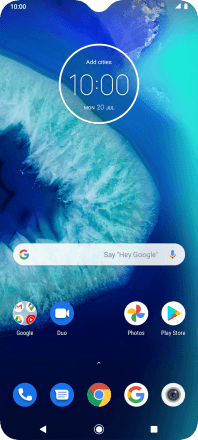
Slide two fingers downwards starting from the top of the screen.
![](http://cdn.sp-selfservice.com/ml/7090822-f-d9ba627f-b9c2-453b-b6a1-25e5eeb55739.png?width=198&height=444)
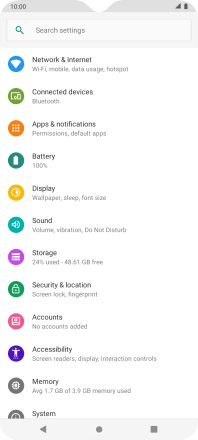
Press the settings icon.
![](http://cdn.sp-selfservice.com/ml/7090822-f-e98aee35-e127-4f12-b0aa-112b3734c6a6.png?width=198&height=444)
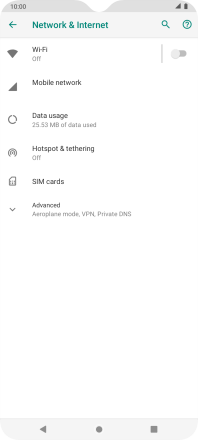
Press Network & Internet.
![](http://cdn.sp-selfservice.com/ml/7090822-f-18ccd05a-d8b9-4a55-b6db-9d863c4a0375.png?width=198&height=444)
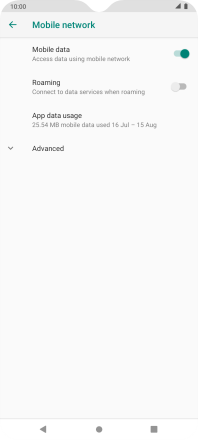
Press Mobile network.
![](http://cdn.sp-selfservice.com/ml/7090822-f-60f1e144-2d3c-4ec9-995d-dca885e05b14.png?width=198&height=444)
Press Advanced.
![](http://cdn.sp-selfservice.com/ml/7090822-f-61bd886e-2149-4a19-becb-a598686aaa75.png?width=198&height=444)
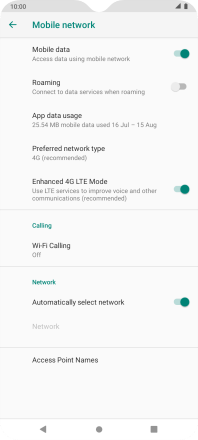
Press Access Point Names.
![](http://cdn.sp-selfservice.com/ml/7090822-f-10308343-6446-44fd-817c-a5bbebcec098.png?width=198&height=444)
2 Create new data connection
Press the new data connection icon.
![](http://cdn.sp-selfservice.com/ml/7090822-f-bb64e149-3696-4af9-9045-3f1a986d6e6b.png?width=198&height=444)
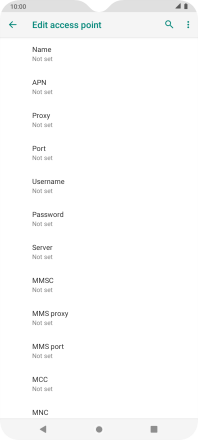
3 Enter a name for the connection
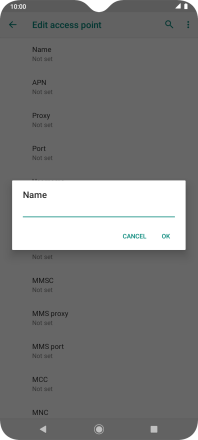
Press Name.
![](http://cdn.sp-selfservice.com/ml/7090822-f-86d414d5-2e83-40d7-bdfd-f6eb9606c1eb.png?width=198&height=444)
Key in Lebara Internet and press OK.
![](http://cdn.sp-selfservice.com/ml/7090822-f-a3f4df96-2310-4fac-af8b-758d77dbe824.png?width=198&height=444)
Lebara Internet
4 Enter APN
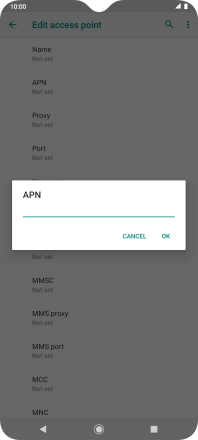
Press APN.
![](http://cdn.sp-selfservice.com/ml/7090822-f-86d414d5-2e83-40d7-bdfd-f6eb9606c1eb.png?width=198&height=444)
Key in uk.lebara.mobi and press OK.
![](http://cdn.sp-selfservice.com/ml/7090822-f-b700740a-792b-4a69-a129-fbcbbca3b817.png?width=198&height=444)
uk.lebara.mobi
5 Enter username
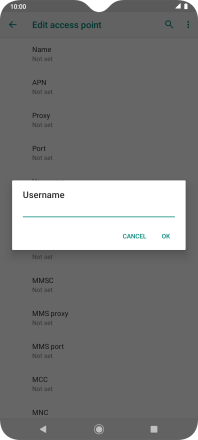
Press Username.
![](http://cdn.sp-selfservice.com/ml/7090822-f-86d414d5-2e83-40d7-bdfd-f6eb9606c1eb.png?width=198&height=444)
Key in wap and press OK.
![](http://cdn.sp-selfservice.com/ml/7090822-f-60bb2fd6-74e8-4eb6-92bc-3816cc5ade72.png?width=198&height=444)
wap
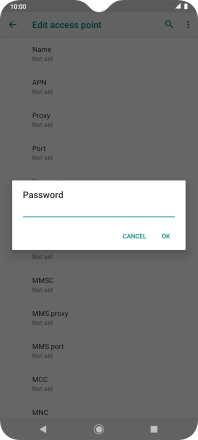
6 Enter password
Press Password.
![](http://cdn.sp-selfservice.com/ml/7090822-f-86d414d5-2e83-40d7-bdfd-f6eb9606c1eb.png?width=198&height=444)
Key in wap and press OK.
![](http://cdn.sp-selfservice.com/ml/7090822-f-e65e37d3-f6c0-4788-98a7-05bbc07d9e6a.png?width=198&height=444)
wap
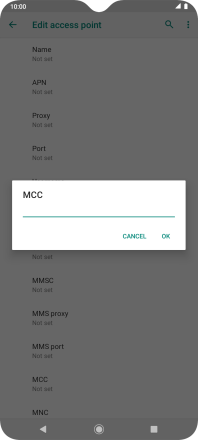
7 Enter country code
Press MCC.
![](http://cdn.sp-selfservice.com/ml/7090822-f-86d414d5-2e83-40d7-bdfd-f6eb9606c1eb.png?width=198&height=444)
Key in 234 and press OK.
![](http://cdn.sp-selfservice.com/ml/7090822-f-1d6a0231-c705-4681-9624-fd191eb95f60.png?width=198&height=444)
234
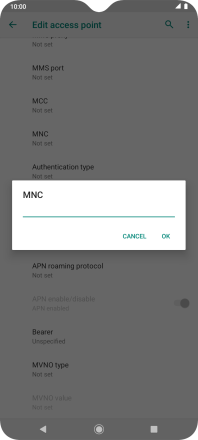
8 Enter network code
Press MNC.
![](http://cdn.sp-selfservice.com/ml/7090822-f-5f46a04e-b3f6-4420-8f7e-275ae5c7c52d.png?width=198&height=444)
Key in 15 and press OK.
![](http://cdn.sp-selfservice.com/ml/7090822-f-c516e546-19e1-49a3-8ed4-a1188e41073e.png?width=198&height=444)
15
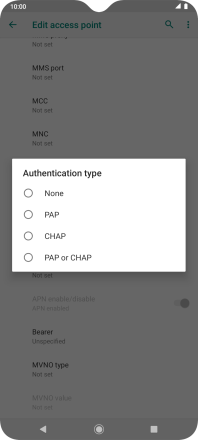
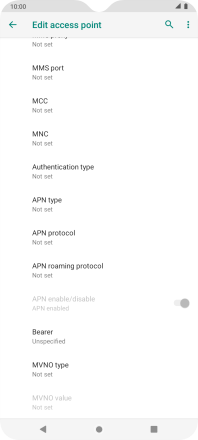
9 Select authentication type
Press Authentication type.
![](http://cdn.sp-selfservice.com/ml/7090822-f-5f46a04e-b3f6-4420-8f7e-275ae5c7c52d.png?width=198&height=444)
Press None.
![](http://cdn.sp-selfservice.com/ml/7090822-f-c896e7af-e1e7-460b-83f6-2d2df0298c4e.png?width=198&height=444)
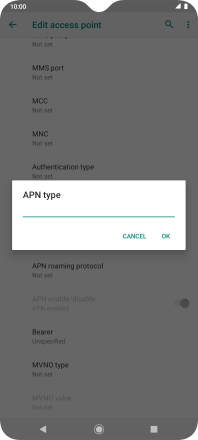
10 Enter APN type
Press APN type.
![](http://cdn.sp-selfservice.com/ml/7090822-f-5f46a04e-b3f6-4420-8f7e-275ae5c7c52d.png?width=198&height=444)
Key in default and press OK.
![](http://cdn.sp-selfservice.com/ml/7090822-f-d7e12a92-56df-4472-b5cb-773c953275d3.png?width=198&height=444)
default
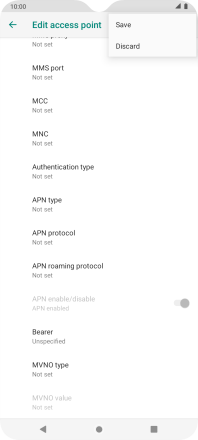
11 Save data connection
Press the menu icon.
![](http://cdn.sp-selfservice.com/ml/7090822-f-5f46a04e-b3f6-4420-8f7e-275ae5c7c52d.png?width=198&height=444)
Press Save.
![](http://cdn.sp-selfservice.com/ml/7090822-f-45fdc6dd-0f9a-483f-a05b-c286fb81d20a.png?width=198&height=444)
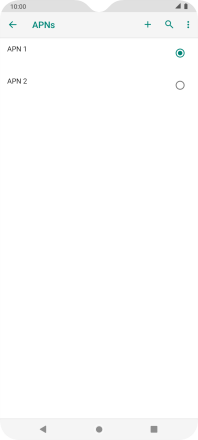
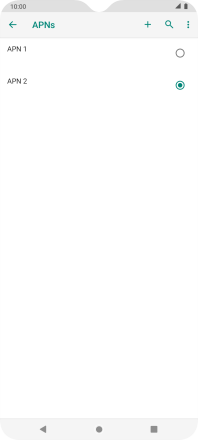
Press the field next to the data connection to activate it.
![](http://cdn.sp-selfservice.com/ml/7090822-f-c0d879d0-cf11-434d-a72e-f6de0450c968.png?width=198&height=444)
12 Return to the home screen
Press the Home key to return to the home screen.
![](http://cdn.sp-selfservice.com/ml/7090822-f-11ba5861-2a48-4550-8206-829e0e6c18d0.png?width=198&height=444)