Samsung Galaxy A33 5G
Android 12.0
Select help topic
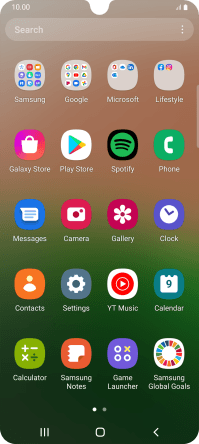
1. Find "Contacts"
Slide your finger upwards on the screen.
![](http://cdn.sp-selfservice.com/ml/7160123-f-005efa7d-4293-4645-b8c6-863bef172246.png?width=200&height=444)
Press Contacts.
![](http://cdn.sp-selfservice.com/ml/7160123-f-1847dbc6-3fc9-4995-ae6d-ccb6efa38386.png?width=200&height=444)
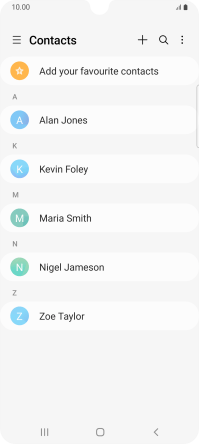
2. Create contact
Press the new contact icon.
![](http://cdn.sp-selfservice.com/ml/7160123-f-10bc77b5-2f73-422f-8afc-f6ee38ac7b78.png?width=200&height=444)
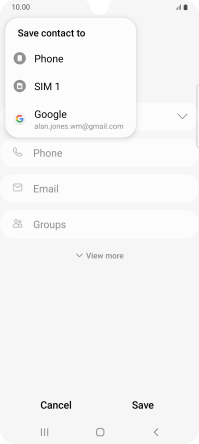
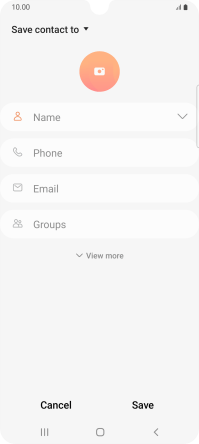
3. Select address book
Press the address book drop down list.
![](http://cdn.sp-selfservice.com/ml/7160123-f-aefc0931-a93e-4435-ae92-f8ec4eb3d09a.png?width=200&height=444)
Press Phone.
![](http://cdn.sp-selfservice.com/ml/7160123-f-7155467a-8ea8-406b-aa6c-8b89aa39b5ba.png?width=200&height=444)
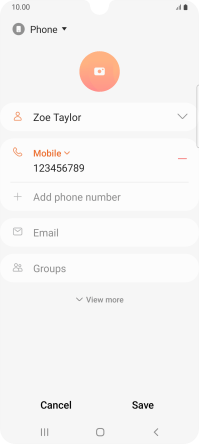
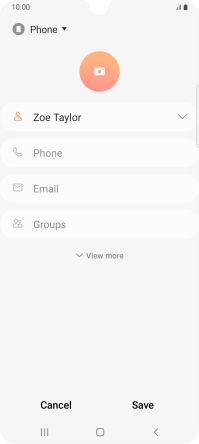
4. Enter name
Press Name and key in the required name.
![](http://cdn.sp-selfservice.com/ml/7160123-f-aefc0931-a93e-4435-ae92-f8ec4eb3d09a.png?width=200&height=444)
5. Enter phone number
Press Phone and key in the required phone number.
Follow the instructions on the screen to add more information such as an email address and a personal ring tone.
![](http://cdn.sp-selfservice.com/ml/7160123-f-73232af0-0d6d-4804-951a-c2357440135b.png?width=200&height=444)
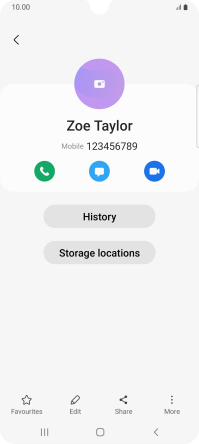
6. Save contact
Press Save.
![](http://cdn.sp-selfservice.com/ml/7160123-f-2bcf5e9f-1a2c-4d13-a8ee-ce68a924716a.png?width=200&height=444)
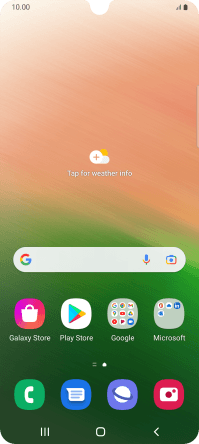
7. Return to the home screen
Press the Home key to return to the home screen.
![](http://cdn.sp-selfservice.com/ml/7160123-f-ad8272d2-5286-4c46-8999-1e13b52de43d.png?width=200&height=444)