Samsung Galaxy A50
Android 9.0
Select help topic
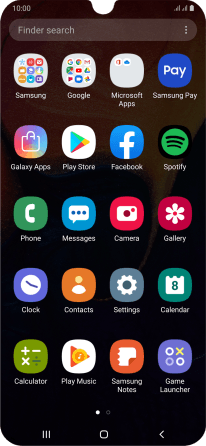
1. Find "Contacts"
Slide your finger upwards on the screen.
![](http://cdn.sp-selfservice.com/ml/7090822-f-72f996c0-1c9e-4fe8-b385-c67e0a931f1b.png?width=206&height=450)
Press Contacts.
![](http://cdn.sp-selfservice.com/ml/7090822-f-6044db75-a171-436d-a57e-2cc30074b1e4.png?width=206&height=450)
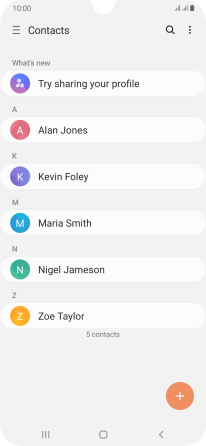
2. Create contact
Press the new contact icon.
![](http://cdn.sp-selfservice.com/ml/7090822-f-1dc13cab-59e3-4fcc-901a-1e66c35ea739.png?width=206&height=450)
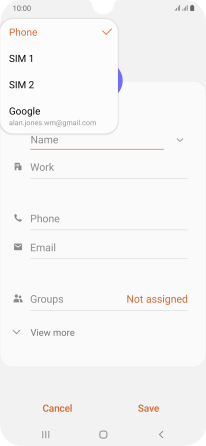
3. Select address book
Press the address book drop down list.
![](http://cdn.sp-selfservice.com/ml/7090822-f-7b2705e4-a169-41fb-9d2f-bd68a63fc570.png?width=206&height=450)
Press Phone.
![](http://cdn.sp-selfservice.com/ml/7090822-f-65f2c018-7630-4ad0-ad26-2071652b76a1.png?width=206&height=450)
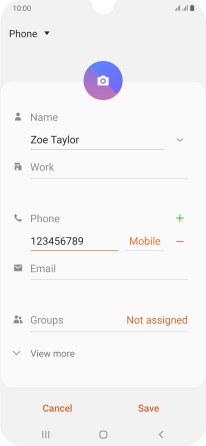
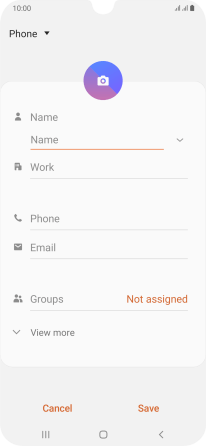
4. Enter name
Press the field below "Name" and key in the required name.
![](http://cdn.sp-selfservice.com/ml/7090822-f-7b2705e4-a169-41fb-9d2f-bd68a63fc570.png?width=206&height=450)
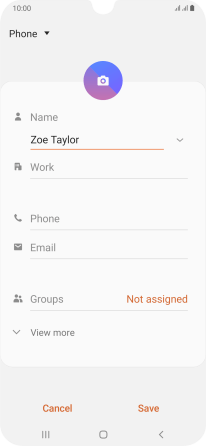
5. Enter phone number
Press Phone and key in the required phone number.
Follow the instructions on the screen to add more information such as an email address and a personal ring tone.
![](http://cdn.sp-selfservice.com/ml/7090822-f-d842e4c0-2a39-4f4f-9c54-486ff6476aa3.png?width=206&height=450)
6. Save contact
Press Save.
![](http://cdn.sp-selfservice.com/ml/7090822-f-bcd5a721-2cdb-401b-b032-43ea489cc6ee.png?width=206&height=450)
7. Return to the home screen
Press the Home key to return to the home screen.
![](http://cdn.sp-selfservice.com/ml/7090822-f-e4c0bd79-8c67-433f-861f-96799a47c18c.png?width=206&height=450)